
Hi friends, this tutorial will help you to root your favorite Samsung Galaxy J6 SM-J600F On Oreo 8.0 using the CF Autoroot method.
The Samsung Galaxy J6 is a wonderful budget Smartphone from the Koreans with quite amazing specs. It comes with a 5.6 inches Super AMOLED capacitive touchscreen display having Corning Gorilla Glass protection against scratches, 4 GB RAM, microSD slot expandable upto 256GB, Fingerprint sensor, 13MP rear and 8MP front camera, Octa core processor and lot more.
OMG! don’t forget our objective here, because this is not a spec review but a tutorial to root Galaxy J6 SM-J600F running on 8.0 Oreo firmware.
Further if you would like to have a look at the Galaxy J6 secret codes please find it below;
Please note that this method is compatible only on Galaxy J6 SM-J600F running on Android 8.0 Oreo firmware.
Please note that you need to take a backup of your complete files on your phone memory, just a precaution for worst case scenario. Also please keep in mind that the rooting will void your warranty. SamsungSFour.com is not liable for any damage caused as a result of this tutorial.
The below list shows the order in which our rooting steps proceed. CF Autoroot rooting method have common procedure for all the devices though.
In concise the CF Autoot procedure consists of 5 main steps;
- Making backup of your phone memory to an external storage
- Enabling OEM Unlock and USB Debugging
- Downloading the root files
- Entering into the download mode
- Starting the rooting procedure with the Odin application on your desktop computer.
It looks like now you have an idea on the rooting procedures. So lets proceed with the rooting steps in the order listed above.
Steps To Root Galaxy J6 SM-J600F on Android 8.0 Oreo using CF AutoRoot
1. In the first step please download the file from below given link (please report broken links using the comment form).
2. Download the file to your PC desktop for easy access. Once downloaded please extract it. You may check the below screenshot to get idea on the extracted contents.

3. Now enable ‘USB debugging mode” on your Galaxy J6. Please find the detailed tutorial for that in the below given link.
4. Once USB debugging is enabled on your phone please enable the “OEM unlock”. The below tutorial will give you an idea on the before said in a detailed way.
Entering Download Mode
5. Once done please power off your phone and enter it into “Download mode“.


Once done please install the Samsung USB drivers for your phone. Please find the drivers from the below given link. If you didn’t install the proper Samsung USB drivers there is always a chance that your phone may remain undetected in the Odin. If properly connected “Odin” will give you an “Added” message.
6. Now open the “image” folder (from the earlier downloaded files) and you will see a file named “image.tar.md5” like shown in the screenshot below.
![]()
7. In the next step go back to the main folder and you will see contents like in the below screenshot.
8. Once you are in the main folder please open the “tools” folder and run the “Odin.exe” file from there.

Now you have to double click the “odin.exe” (or similar one) file which will open a window like the one shown in the image below. Once done connect your phone using the USB data cable to your PC. If the connection was successful you will get an added message in the “Odin” app.
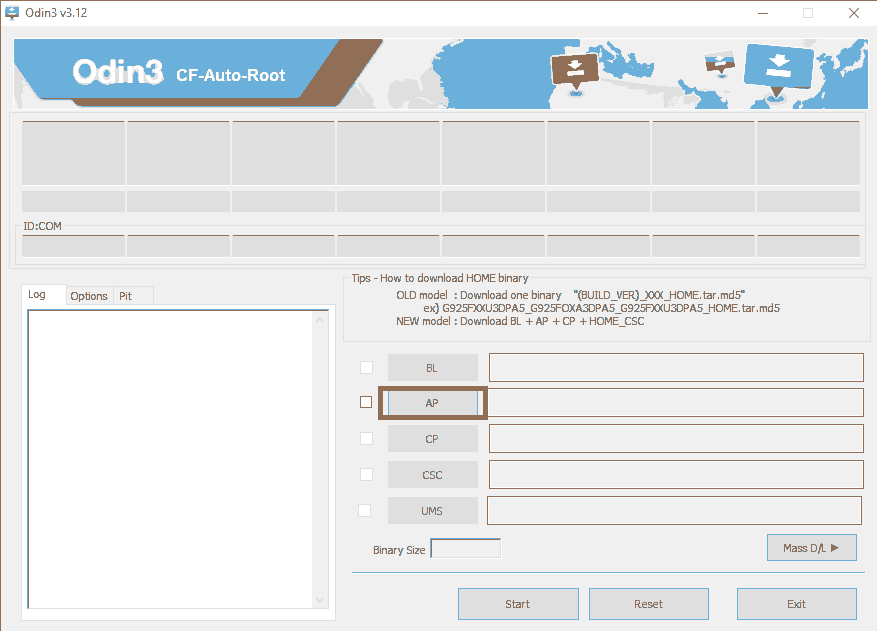
Adding files in Odin
In the next step click the “AP” button in the Odin app and select the “image.tar.md5” file you have found in the “image” folder (mentioned in step no: 6). Now click the “Start” button in the Odin to start the rooting process.
Once the rooting process is started it will finish by it’s own. When it’s done your Galaxy J6 will reboot to be rooted with super user capabilities. You may confirm the root by the “Pass” message from the Odin window and also using any root checker app that can be downloaded from the Google Play Store.
That’s it guys, please don’t forget to like/share in the social networking sites if this tutorial was helpful.
Normal Issues And Solutions After Rooting your Galaxy J6 SM-J600F
- How To Resolve Android Boot Loop On All Samsung Galaxy Smartphones?
- How To Resolve Not Able To Enter Recovery Mode On Galaxy Smartphone When In Bootloop?
- How To Resolve “not registered on network” Error on Galaxy Smartphone?
- How To Remove FRP Lock On Samsung Galaxy Android Smartphone?
- How To Resolve “Verification Failed, Unable to restart your device” Error On Galaxy Smartphone?
Normal queries for this tutorial
- How To Root Galaxy J6 SM-J600F Running On Android 8.0 Oreo Using CF AutoRoot?
If you have faced any issues while trying to root your Galaxy J6 SM-J600F running on Android 8.0 Oreo, please feel free to post it in the comment section below, don’t worry I will help you as fast as I can.
If “How To Root Galaxy J6 SM-J600F On Oreo 8.0 Using CF Autoroot Method?” tutorial really helped you, please give a like/share on social networking websites by using the below given buttons.