Image Credits: Samsung Electronics
This tutorial will guide you through the whole process of rooting your Samsung Galaxy A5 SM-A500F running on Android KitKat 4.4.4 firmware. This monster phone comes with a 5.0 inches Super AMOLED capacitive touchscreen display, 1.2 GHz Quad Core processor, 13MP camera rear and 5MP front camera.
But, please note that rooting will void your warranty, but you can always unroot it to reinstate warranty. SamsungSFour.Com will not be liable for any damage caused as a result of executing the below given steps.
Table Of Contents
Prerequisites
Before proceeding with the procedure given here please make sure that you have made a complete backup of your phone memory including contacts, photos etc. Also the phone battery should be charged to a min of 80%.
Steps To Root Galaxy A5 SM-A500F on KitKat 4.4.4 using CF Autoroot
1. First please download the files for rooting Samsung Galaxy A5 SM-A500F from the below given links;
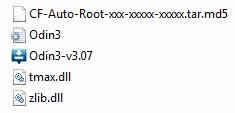
2. After downloading the above file please extract it to your PC desktop so that it is easily accessible, the below screenshot shows similar file contents in the package;
3. Now enable “USB debugging mode” on your Samsung Galaxy A5 SM-A500F from Settings->Developer Options->USB Debugging. If you have any confusion please check the below tutorial for detailed procedure.
4. Once you have enabled USB debugging, you have to enter your Samsung Galaxy A5 into “Download Mode“, to enter into download mode switch off your device and press and hold “Vol Down+Home+Power” buttons at the same time until you get the warning screen like the one given below.

Now please click “Volume Up” button to confirm and you will enter into the “Download Mode“. If you are getting a similar screen like the one shown below then you are in the final download mode screen.

4. Now open Odin as administrator and connect your Samsung Galaxy A5 with your PC using the USB cable. If the connection was successful you can see an “Added” message from the Odin window. Then click the “PDA” button and select the already extracted “.tar.md5” file located on your PC desktop.
Please make sure that “Auto Reboot” and “F. Reset Time” options are only check marked in the Odin.
5. Once confirmed click the “Start” button in the Odin and wait for the rooting procedure to get finished. When it’s completed your phone will restart and it will automatically attain superuser privileges.
You can confirm whether the procedure was successful or not from the “Pass” message displayed in the Odin….Lets celebrate, now you are the ultimate user of your Galaxy A5.
If you have faced any issues while rooting your Galaxy A5 SM-A500F on KitKat 4.4.4 firmware, please feel free to post it in the comment section below, don’t worry I will help you as fast I can.
If “How To Root Samsung Galaxy A5 SM-A500F On KitKat 4.4.4?” tutorial really helped you, please give a like/share on social networking websites by using the below given buttons.